Electronic Payment Terminal | Toy Catcher Machine

Soft toy catcher machines
from Catcha Toy Here.
(Original licensed soft toy for catch)

Electronic payment system for toy catcher machine.

Allows customer to pay by credit card, Visa, Master card, AMEX, Ezlink, NetsFlashPay. You can also accept mobile payment through Apple Pay and Google Pay.

Alternate Machine Name

  • Soft Toy Catcher Machine
  • Claw Crane Machine
  • UFO Toy Catcher
  • Candy Catcher

Application

Other payment system solutions

Contact us for custom payment system design and deployment.

Check out our cashless payment terminal rental service in Singapore.

Payment Card Reader Terminal Dimension

Card Payment Reader Terminal Model
Terminal front view and back view.

iUC180 Payment Card Reader Terminal for cashless card payment in Singapore. This wireless card terminal is very compact in size.

The terminal is designed with a EVA mounting standard. The standard standardise and simply the terminal device mounting work.

The following presents the dimension and size of the card payment reader terminal so that you can have some idea how it can fit into your vending or gaming machines.

Card terminal perspective view.
Exploded view.

Card Terminal Dimension

The card terminal measures about 102x134x71mm.

Card Payment Terminal Dimension Size

Propose Mounting Bracket for Payment Terminal

Propose 4x M4 studs at the corner, forming a rectangular shape. To be secure by nuts.

Recommended mounting through the 4x M4 studs.

Propose Mounting Bracket Dimension

Mounting bracket studs size and position

Card Terminal Labeling Dimension

Terminal Casing Customisation

Check out our card payment terminal rental package which includes our standard fabricated casing for your vending or gaming machines. This rental package is design for businesses to cap unforseen operating cost expense relating to the payment terminal.

Interfacing Cable Tester

The cable tester is functional without connecting to external devices or system.

A 4 pins connector (green pluggable terminal connector) is available to allow custom connection to your own device or equipment. This connector is isolated via an optocoupler. This isolation will protect the tester from damage due to any wrong external connection.

Custom User Interface to Cable Tester

The simple interface can be a switch and LED indicator. You may want to use your own foot padel switch to start the wiring connection test or may have your own indicator panel for your operator use.

You can adopt to the following connection.

Multiple Cable Tester Linking Together

For some situation, this tester may not have enough test point for your cable harness. Each tester can only connect up to 64 connection points. If your connect has more than 64 points that you want to test in one shot, you can consider interfacing them in parallel as shown in the diagram.

This connection allows you to test cable harness with many connection points at the same time. It will allow a single test switch to trigger the tester. Any fault detected from one of the testers, it can drive your external indicator.

*** Please note that the test connection points are not inter-connected between the individual tester modules. Just take note to connect only groups of wires that are inter-connected together within a single tester.

Digital Controller Connection

The tester can also be connected to your digital logic controller for more custom/complex control of your entire system.

The connection has a opto-coupled design. This will ensure that the tester will not cause interference issue to your controller or be affected by any external controller interfacing.

Interfacing to High Power Devices

For interfacing to high power devices, it is recommended to have a relay as the interface to isolate from the tester. The optocoupler built inside is meant to protect the tester. It cannot be used to drive a high current. Any current higher than 0.1A, it is recommended that a bigger relay is used for the interfacing.

The following is an example of the connection you can do to drive high power devices.

Click here to go back to the CCT-01 Cable Tester product page.

Cashless Card Payment for Vending Machine

Looking for a cashless card payment reader for your new vending machine?

Check out this page, to guide you along in getting your machine connected to the latest digital payment system.
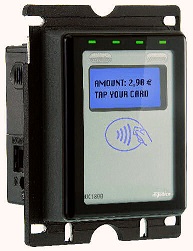
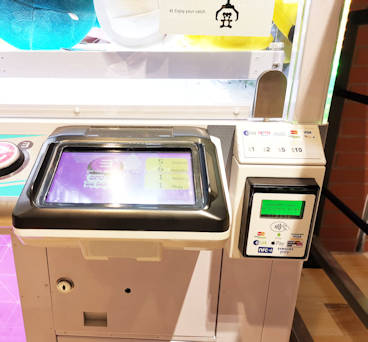
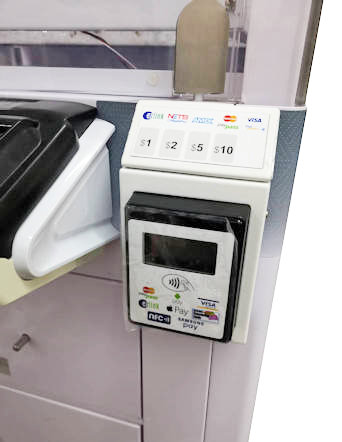
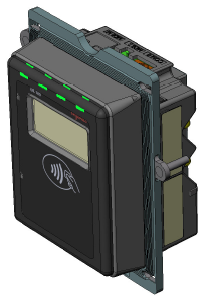
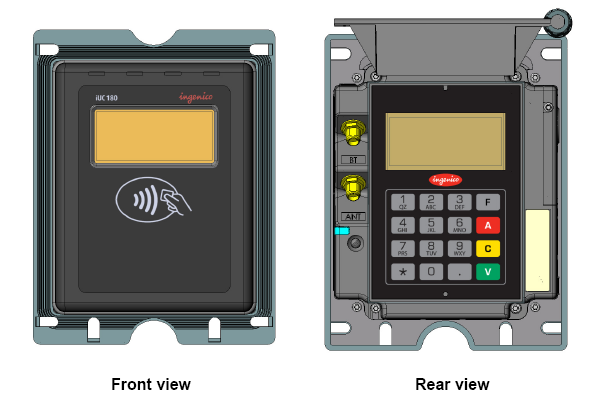
cashless payment terminal for vending machine                    japan drink vending machine

Cashless Card
Payment Terminal

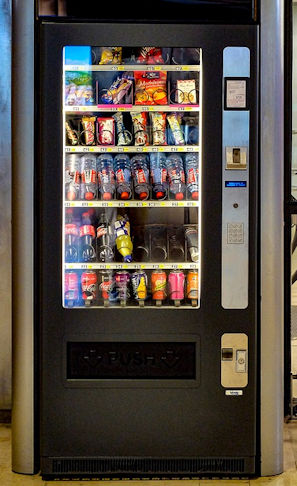
Selecting Your Vending Machine

There are many types of the vending machine to choose from. You do not need to be restricted or worry about not being able to connect with a cashless payment system. We are proficient in connecting up systems together.

One important point to take note is understanding the vending machine standard. As the vending machine is getting more and more popular, standards are established in the industry. Having a standard enables easier integration with vending machine related peripherals.

food vending

The two common communication standard between vending machine peripherals and electronic devices are MDB and VCCS. This standard takes care of how electronic devices talks to other devices within the vending machine.

MDB (Mutil-Drop Bus) is a common vending machine protocol used in the European countries. It is fairly common in Singapore too.

VCCS is a common vending machine protocol used in Japan. You might be able to see innovation Japan vending machine deployed around Singapore island.

DEX (Data Exchange) is a protocol for collecting audit and monitoring events information from vending machines.

EXE (Executive protocol vending machine) by Mars Electronics (in the 1980s) selling Mars snacks, introduced Protocol A, fondly known as the “Executive Protocol”. Initially designed for changegiver management, it has since evolved to facilitate cashless transactions. With the EXE protocol, sales transactions are seamlessly overseen by the changegiver, allowing for flexible pricing control on both the machine and the changegiver itself.

It is recommended that you look for a vending machine that is supporting MDB communication protocol. You can ask your vending machine manufacturer if their machine can support MDB or VCCS.

Using a vending machine design to the specific standard is cost-effective. You can simply plug in an MDB enabled cashless card payment terminal and you expect it to work without issues. It is plug and play. There is a lower probability of facing technical issues. This also translates to lower deployment cost and maintenance cost.

A vending machine that does not conform to the MDB or VCCS standards can also be connected to a cashless card payment terminal. Our engineer will have to assess your unique vending machine and design interfaces to enable your machine to communicate with the standard payment system. Many new unique vending machine may not support MDB or VCCS.

If you want to use such a unique vending system, we can assist you further. Simply send us your vending machine information,

  • photos of the machine,
  • technical documentation,
  • operation manual,
  • etc…


Contact PIC-CONTROL for further questions.

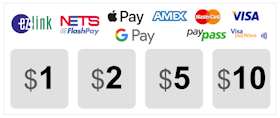
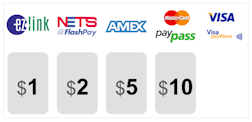
Cashless card payment device accept Ezlink, NetsFlashPay, CEPAS, Credit Card (Visa/Master), Alipay, etc… For more information on the terminal, you can check out this cashless payment terminal commonly used in Singapore.


Typical Vending Machine Payment Application

food ticketing voucher    Beer dispenser     Fuel dispensing payment system

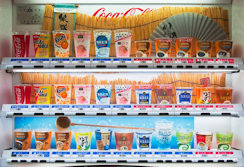
  • Drinks Vending Machine
  • Drinks Dispenser Machine
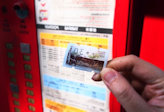
  • Food Voucher Ticket Machine
  • Microwave Food Vending Machine
  • Electronic Gadget Vending Machine
  • Sandwiches Vending Machine
  • Newspaper Vending Machine
  • Candy Station
  • Snacks Vending Machine
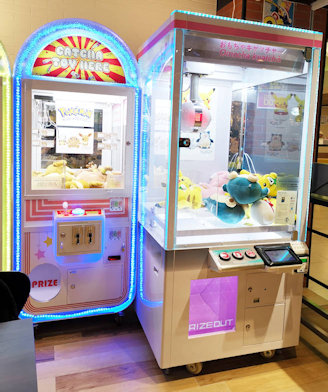
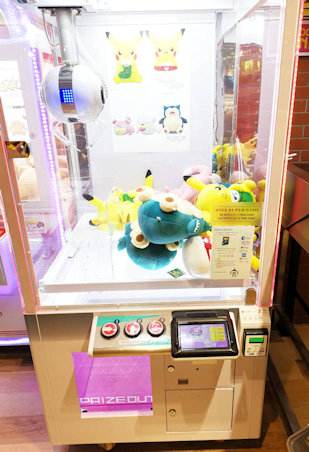
  • Surprise Toy/Gift Vending Machine
  • Ice-Cream Dispenser Machine
  • Gold Vending Machine
  • Cigarette Vending Machine
  • Beer Vending Machine
  • Ticketing Machine
  • Coffee Maker
  • Water Dispenser


Click here to check out our -> cashless payment solution in Singapore.


Cashless Card Payment for Arcade Gaming

Wanting to integrate a Cashless Card Payment system for your arcade gaming machine in Singapore?

Game payment using Ezlink, NetsflashPay, Credit Card (Visa/Master), Alipay, and more…

Cashless Payment Terminal System

Game Arcade Centre Gaming machines

Custom Solution for Cashless Payment

Send us your arcade machine information for our assessment of your gaming or entertainment machine. We will be able to provide you with a quote.

Click here to check out our rental rate of a cashless payment device for your gaming machine.

Table game machine    Toy catcher machine

Suitable Arcade Gaming Use

Basketball gaming

  • Arcade Gaming Machine
  • Toy Catcher
  • Table Game
  • Virtual Shooting Game
  • Slot Machine
  • Juke Box Machine
  • DIY Karaoke Booth

Slot game machine    Juke box


For more information, click here to check out our -> cashless terminal payment system offer in Singapore.

Automatic Identify Cable Connection | Wiring Trace & Map Productivity Tool

Are you looking for a tools that can help you identify and trace out the connection from your complex chunck of cable & harnesses with a press of a button?

Get hold of this awesome engineering tool for your electronic lab.

This tester maps out the connection of your cable saving you time and provide you with accurate results.

Advantage

  • Generate a comprehesive pin to pin connection report.
  • Fast.
  • Accurate connectivity report.
  • No more human error in your diagnosing of the cable wires connection.
  • Decide complex wiring connection.

Examine the pin connection at a glance through the generated mapped connection report.

Automatically mapped out all the wiring on the cable for you. You do not have to trace each pin connection one by one. You will get instant result through the generated test report.

No matter how complex your cable or harnesses is, the process of decoding your wire connection is still the same.

Simply connect each connector pin wire to one of the terminal on the PIC-350 connection decoder, it will automatically trace, identify and mapped out all the connection for you.

The only thing you need to do it to analyse the generated report and document the results.

Simple. No more painstaking connection measurement, checking pin by pin manually using a multimeter.

PIC-350 is an awesome and smart X-ray tool for your cable wires reverse engineering work.

A productivity tool that an electronic engineer will keep on their engineering work bench.

A great tool to discovery the connection of a new or unknown cable. Can also be use for trace passive connection on your PCB circuit board.

– Cable connection reverse engineer tools
– Cable connection tracer, mapping
– Auto mapping of complex cable wiring connection.
– Auto detection of wiring connection


Check out more information about this cable connection analyser product PIC-350.


Guide to Wire Connection Tester for Assembled Cable Production

CCT-01 is a universal wire connection tester to test all kinds of wiring configuration instantly. Fast cable tester and simple to use.

This device can learn the connection from your original cable wiring, and subsequently test the rest of your reproduced cables.

CCT-01 wire harness tester. A productive tool that you should keep on your tool shelves.

Click here for more information about CCT-01 tester.

Test Setup for D-sub RJ11 Assembled Cable

Imagine you are mass producing a cable (D-sub and RJ11 connectors). You would like to test and ensure the wiring is done correctly before you shipped out to your customer. You can setup the tester as shown in the picture.

D-Sub and RJ11 connector connection tester device (PIC-350)

  1. First step is to buy or prepare the mating connectors for your D-sub connector end, and your RJ11 connector end. The mating connectors are for making the connection to the cables that you wanted to test.
    It acts as an adaptor interface between your cable and the CCT-01 tester.
  2. You can wire up the individual wires to any of the port connectors on CCT-01. It does not matter which port you connect because the device can learn the wiring connection on-the-fly. You just need to ensure all the wiring are connected.
  3. Power up the CCT-01 through a USB mini-B cable.
  4. Connect your original master cable (a sample with the correct wire connection) to the CCT-01 via the adaptor interface that you had prepared in step no. 1.
  5. Press the learn button to allow the device to learn the connection from this master cable.
  6. You can then proceed to swap the master cable with the cable which you want to test
  7. Press the TEST button to begin testing.
    The device will indicate a green light and a valid beep sound if the connectivity is the same.
    A red indicator and an error buzz sound will be sound if the cable does not have the same wiring connection.
  8. Continue to swap to test the remaining batch of your cables.

This tester is designed to be a simple general multi-purpose cable tester. The same test procedure applies to any complex cable harness wiring configuration. Simple to use.

Wiring Connectivity Tester (PIC-350)

online electronic circuit kit Singapore | PIC-store
Click here to buy
.

Check out other references…

Cable Connection Assembly Tester

Cable Connection Assembly Tester

A simple to use cable-tester. One touch button to learn from your master cable, and another button to test your production cables.

Setting Up for Cable Testing

The following is a guideline to using this cable tester to test your cable or wire harness.

  1. Get ready the cable that you want to test.
  2. Prepare the mating connectors for your cable.
  3. Crimp, solder or attach a wire to each pin of the mating connector.
  4. Connect each of the wire to each of the terminal port on the Cable Tester. (You can connect up to 64 points)
  5. Power up the cable tester via the USB mini-B socket.
  6. Connect your Master cable to the mating connectors that are now attached to the Cable Tester.
  7. To learn the wiring of your Master cable, press and hold the small learning touch button on the Cable Tester device. Hold it for about 3 sec until you hear a double beep or see the PASS & FAIL LED flashing.
  8. The Cable Tester device has learned your Master cable.
  9. Remove the master cable from the mating connectors.
  10. Replace it with the production cable that you want to test.
  11. Press on the “Start TEST” to begin testing the cable. The test result will be available almost instantly within a second.
  12. You should be able to see a green LED PASS lighted up if the cable has the same wiring configuration as your Master cable.
  13. If the cable is not the same, you should see a red LED FAIL light up.

Cable Connection Test Report

This cable tester can also be connected via a USB cable to the computer for the display of the cable test result report.

You can use the following software to view the cable tester connectivity report.

Communication baudrate settings: 115200bps, 8 data bits, 1 stop bit, no parity bit, no hardware flow control.

There are a few commands which allow you to measure and generate the cable wiring report.

  • Generate a test report with reference to your master cable.
  • Current cable connection report.
  • Master cable connection report.
  • Learn cable connection and save the wiring configuration as the master template.

Through this report, you are able to see at a glance how a cable is being wired. A master cable wiring configuration can be saved to this tester. This tester can then base on this master cable wiring pattern and test the rest of your production cables.

Cable connection test report

Up to 64 connection points can be tested. A1 to A8 …. to H8 represent the 64 terminal points on this Cable Tester device.

Total EEPROM memory required for 64 connection is 4Kbits (64 x 64 connection points).

Test Result Example:

O – Correct Connection      
M – Missing Connection      
X – Wrong Connection      
– Correct No Connection      
         

Fully Automated Test Solution

This cable tester can also be integrated into your production machine for a fully automated test system for your cables.

Click here to check up more details of this PIC-350 Cable Harness Connectivity Tester.


Payment Terminal

       Cashless Payment Terminal in Malaysia

Payment Terminal Vendors

Online Cashless Payment Vendor

Cashless Payment in Malaysia

  • Touch n GO cashless card payment Touch n GO
  • Alipay QR Code Payment Alipay (QR code)
  • Visa Credit Card Payment Visa
  • MasterCard PaymentMasterCard
  • American Express Payment American Express
  • UnionPay Payment UnionPay
  • JCB Payment (Japan) JCB
  • MyDebit Card Payment MyDebit

Automated Vending Machine Integratation

Contact our sales engineer from PIC-CONTROL for your automated payment terminal integration.